|
This is just a helpful tip when using the V_RECORD or V_OSM_BUILDING_RECORD views in Adhoc Reports - the views automatically exclude records with the status of Void. If you are comparing the number of records in your Adhoc Report to the number of records from search another method, like a Record List Search, you may see different results if any of the records are Void.
0 Comments
This new training document will walk the user through the collection of payment at Intake (versus at Issuance) and how to further process the application from there. Step-by-step instruction and screenshots are included to assist with this process.
Follow this link for more information: http://orepermittinghelp.kayako.com/Knowledgebase/Article/View/processing-plan-review-payments-intake In reviewing a report that we recently issued, Detailed Issued Permits, we noticed that many people are struggling with how to issue Solar/PV installations.
To help out, we have created a new training document that we hope will provide the necessary guidance and clarification on how to permit for these installations: http://orepermittinghelp.kayako.com/Knowledgebase/Article/View/how-to-permit-for-solarpv-installs. It has recently come to our attention that some agencies are still using the ‘Billed’ exceptional payment method to pay permit fees in the Building Module.
Billed: The ‘Billed’ payment method was created to allow the agency to indicate that the customer will receive an invoice or bill and the permit will be allowed to advance through the workflow regardless of when actual funds are received. This is the decision of the issuing agency and the responsibility to track of the issuing agency. Please note, if you are one of these agencies:
From both the Inspections list page directly and from the Inspections tab on the My Tasks page, there is a View Log button available to most users (there is a certain level of permissions required to have this button display). If you are receiving questions/concerns from customers that they scheduled an inspection and no one came out, or that they scheduled for a certain date that you are not seeing in the system, they say it was scheduled a certain way that didn’t work, and any of the other questions about scheduled inspections that you likely get – you can use the Inspection Log functionality to resolve many of these. Checkbox the inspection in the list, select View Log > Inspection Log – the inspection log details will be displayed in a pop-up window.  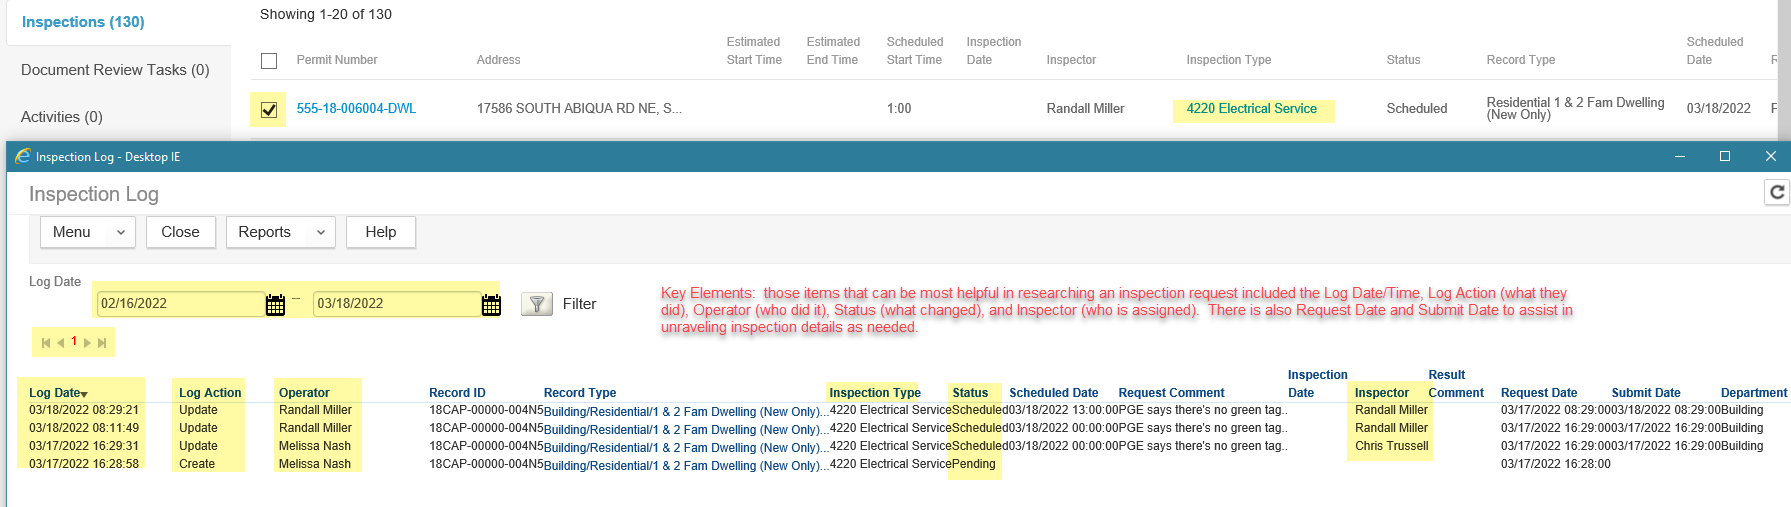  There is a variety of details provided that can greatly assist you in resolving any inspection scheduling issue. We often get calls or helpdesk tickets that are resolved using this same Inspection Log.
If you have any questions on how to use this log, please submit a ticket to the agency helpdesk at [email protected]. TIP #1 - Take a moment in the new year to work with your local IT team at your agency to whitelist the Kayako email domain, to add *.kayako.com to your agency whitelist as a safe sender. Doing this will assure that your agency receives all Kayako replies on any tickets submitted. Otherwise some replies will end up going to your junk mail, you will miss our replies, which will delay our attempts at providing you with timely solutions, information, and guidance. On many occasions, agencies have reached out saying they have not heard on a ticket they submitted, when nearly every time, we have already replied but they did not receive the sent reply as it went to spam/junk.
TIP #2 - Please do NOT ever include the helpdesk email ([email protected]) as a cc on an internal/external email discussion. Emails sent to this address automatically create a helpdesk ticket – so with each reply in your email discussion with a contractor or coworker, a new ticket is potentially created, multiple times over. Also, if forwarding an email discussion to the Kayako help desk for assistance, please summarize the issue you are seeking help for at the top of the email when submitting. TIP #3 - The Kayako help desk and email is for jurisdictions subscribing to ePermitting – this is not the same help desk as for contractors or outside parties, so please do not provide this help desk email to your external customers. Instead please feel free to provide them with the contractor/external customer help desk email at [email protected] - or they/you can call 503-373-7396 for immediate support. Hoping that everyone is now getting into the groove with the new user interface that came with the recent Accela upgrade, and finding that the bumps are smoothing out. If you have not had a chance to read the upgrade documentation (Delegate User changes, Global Search changes, Known Issues with the upgrade) – take this opportunity to read this extremely important documentation. Tips and Tricks
o Report 3 = PLANNING o Report 4 = PUBLIC WORKS o Report 5 = ONSITE If you lose track or forget, once you open a report page, there will be a category named for the module-specific reports – so that’s a quick way to ID what report page you are on. 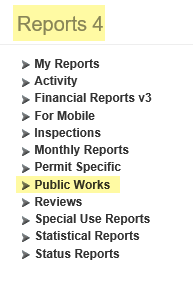
 Formatting Conditions of Approval is really helpful when there is a lot of text for each condition. Fonts, font size, bold, underline, bullets, numbering, and adding a link within the text have had success. However, the italics, inserting a photo, and font color may not keep the formatting on reports. Follow the steps below to create and format a Condition of Approval. 1. With your record selected, click on the Conditions of Approval page. 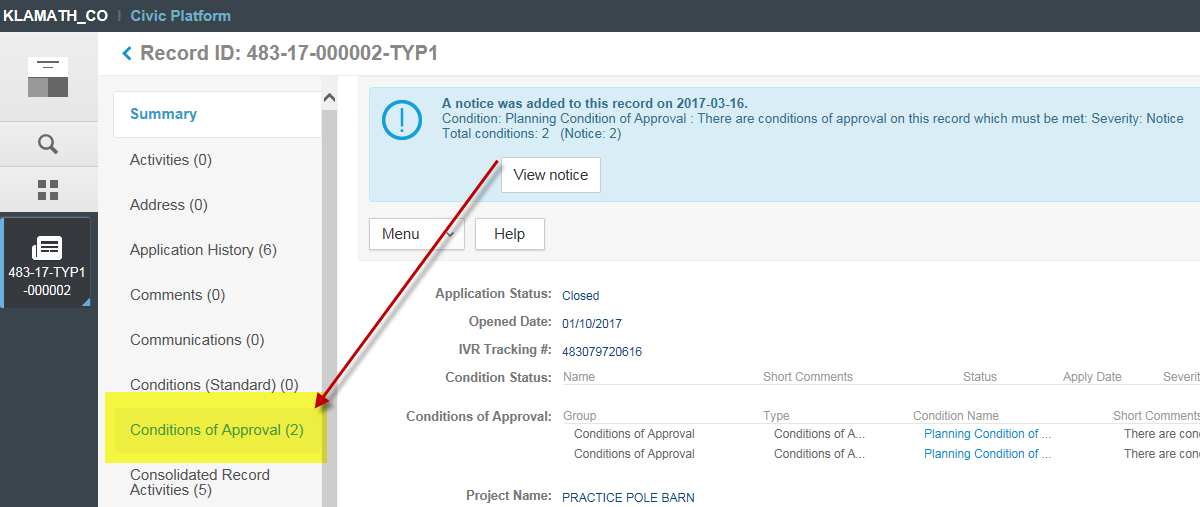 2. Click the New button. 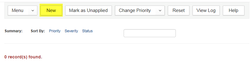 3. Select “Conditions of Approval” from the dropdown. 4. Click the Submit button. 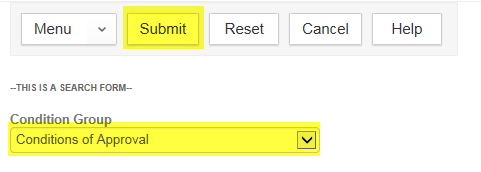 5. Check the box in front of the appropriate Condition of Approval. 6. Click the Select button. 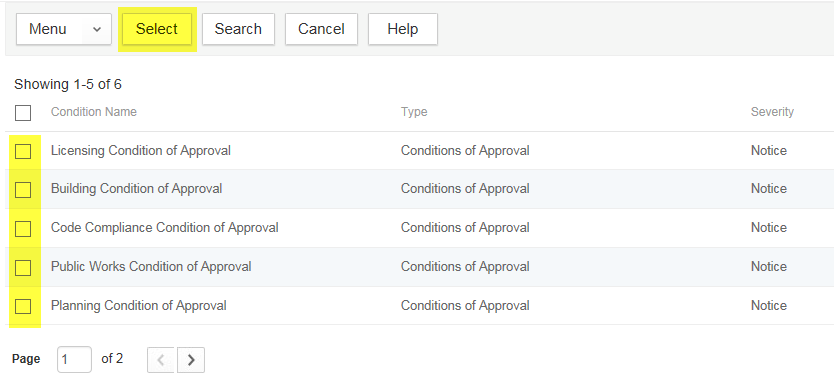 7. The Condition of Approval has now been added with a default comment: “There are conditions of approval on this record which must be met.” 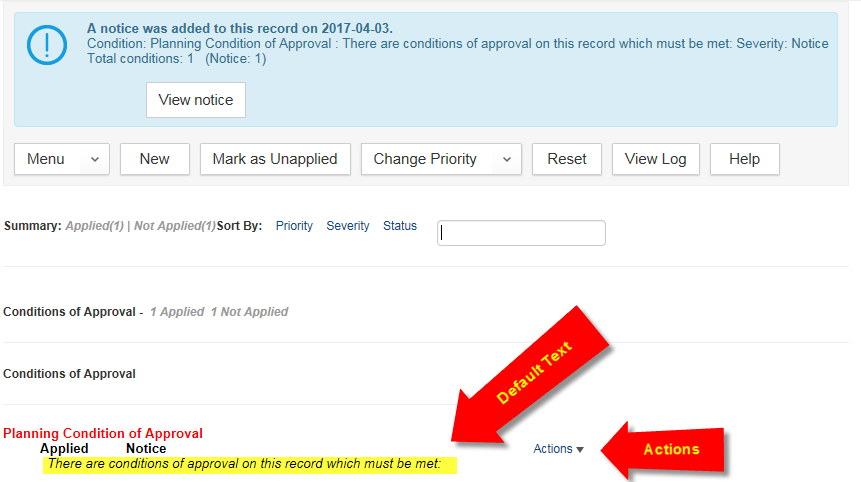 8. To add additional detail, click on the Actions dropdown.  9. A new window will pop up where you may input additional information. There is a basic HTML editor included, which will allow you to format your text. a. NOTE: You have access to any Standard Comments loaded into your agency as well. b. NOTE: Several reports pull in Conditions of Approval along with the HTML formatting and will look much better if your agency uses consistent formatting.  Fonts, font size, bold, underline, bullets, numbering, and adding a link within the text have had success. However, the italics, inserting a photo, and font color may not keep the formatting on reports. 10. To update the default text that appears in the Conditions of Approval list for the record (see #7 above), scroll down and change the Short Comments (this step is optional). 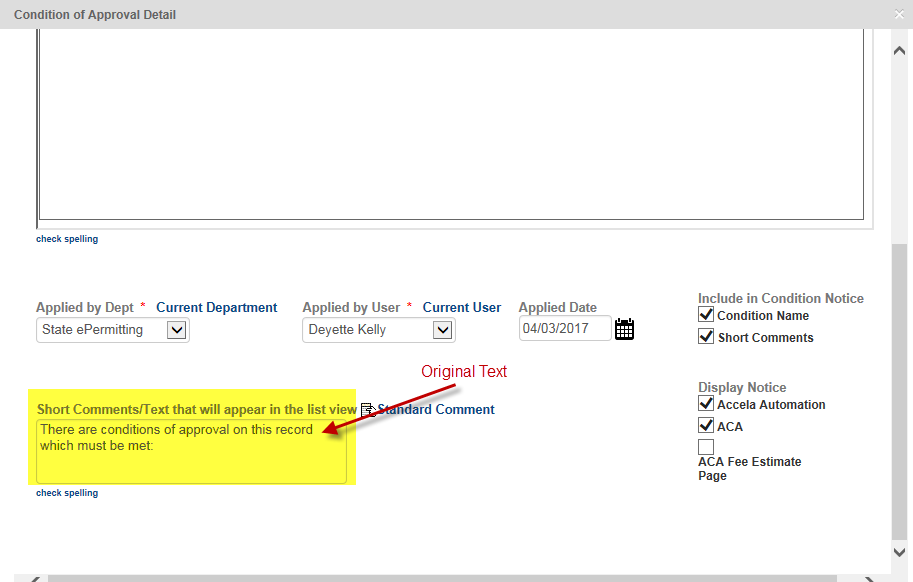 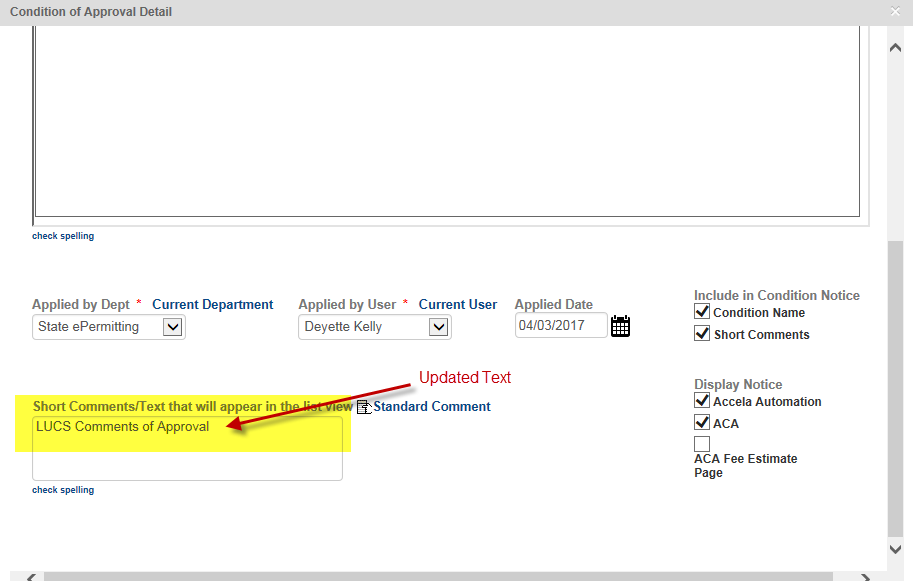 11. After updating with the necessary information, click the Save button. 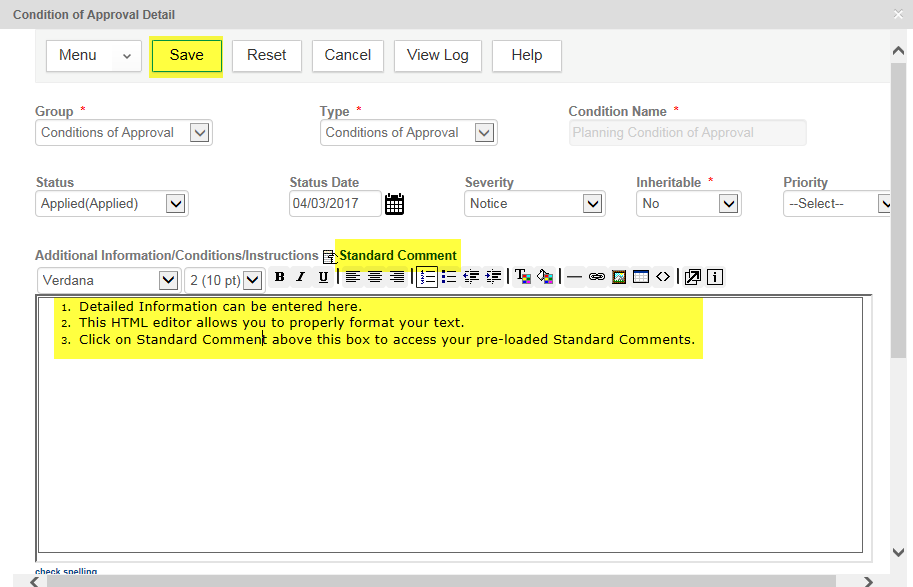 12. You can now see the updated short comments in the list. 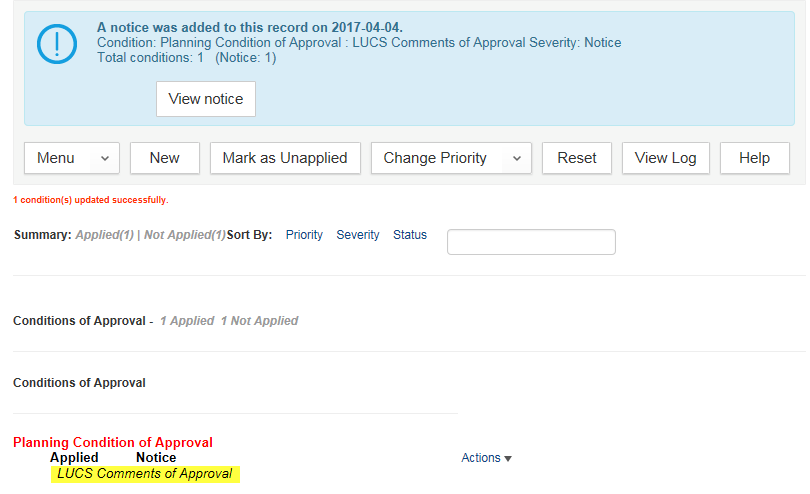 Please note that we use a web-based helpdesk tool called Kayako to manage all of our agency helpdesk tickets – the [email protected] email is directly associated to the Kayako tool – is for agencies only (not for end-user/contractor customers) - and automatically generates a ticket with each incoming email. When we reply to tickets with solutions, questions, follow up, etc. – we are finding that many agencies are not receiving the replies from Kayako, that they are getting caught in spam risk filters. We strive to first reply to all tickets within 24 hours of submittal.
If you find that you are not receiving replies to Kayako tickets, please whitelist (with your IT and/or on your local PC) the Kayako email domain kayako.com and our helpdesk email as well as our helpdesk email listed above to resolve this. The version of Accela that we are currently on is experiencing intermittent issues with batch jobs not running or not writing to the log (batch jobs are things like financial batch information for your finance department, expiration batches, etc.). This is a known issue with our version of Accela that has been fixed in more recent versions. We are starting the Accela upgrade process and will be installing the newest version of Accela in our DEV environment in the next couple of weeks. We’ve been assured by Accela, and have also heard from other Accela users that are on more current versions, that the batch issues are resolved. Testing/validation of the new version will begin as soon as it’s available and barring any show stoppers, we will be pushing to get it into production as soon as possible (we hope this will be within the next few months).
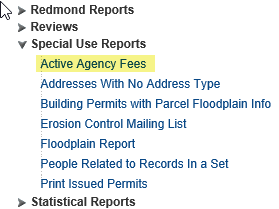
In the meantime, please check regularly that your batches are running as scheduled. If you find that your batch hasn’t run (you didn’t receive the email) let us know as soon as possible so that we can manually run it for you. Thank You for your patience. Need to request a fee update? Ever wondered what your active fees are? You can run a report that will compile all of your agency's active fees into one report that can be saved as an Excel spreadsheet. You can even mark up the spreadsheet and send to ePermitting for your next fee schedule update. To run this report, simply click on the four-square Launchpad icon, scroll down to Reports, click on the Building Reports page. 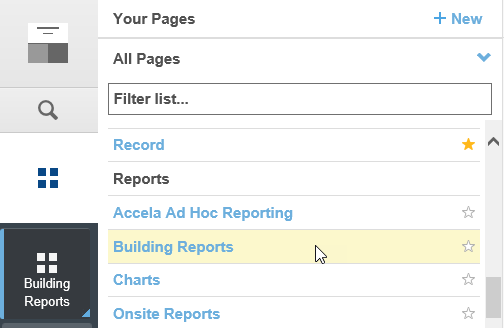
When submitting a ticket because you are experiencing slowness or an issue, please include the following information in your ticket. This will allow us to provide the necessary information to Accela helping them to more quickly pinpoint the issue.
Currently, we have 4 servers and occasionally it will be a single server that is the issue. To help us narrow down which server(s) may be affected, please open a new tab in the same browser session as your current Accela session, and enter the following link into your address bar: https://av.prod.oregon.accela.com/portlets/version.jsp - the below will be displayed: 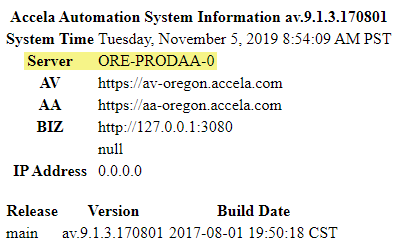 Please let us know which server is showing for you. You can find that information on the server line of the version page from the above link.
Additionally, you can try logging out of your current browser session and then back in to a new browser session until you are able to work successfully. Logging out then back in several times may get you logged into a better performing server as the server assignment is random. Most of you have probably experienced the "blank" dropdown menu issue when you go to result an inspection. You attempt to result an inspection, touch the "scheduled" status and then; poof! The underwhelming experience of not being able to choose a result for the inspection is frustrating at best, but never fear there is a way to fix it for good! This issue was created due to the wonderful work our e-permitting staff has been doing reducing, yes I said reducing, the amount of inspection results available for each permit. Working with our local partners we were able to identify and eliminate and/or combine inspection types to achieve more consistency across the state. Now that you know the backstory lets get right into the fix. Here are instructions for refreshing your System Data on the iPad or iPhone. Android users will follow the same steps.
When you need to indicate that a building permit application is Denied (when there is no way to make the project “issuable”), ePermitting suggests using the task status of Withdrawn. Make sure to include in the comments that it was Denied along with the reason for the denial. Additionally, you could manually update the overall record status to Denied. 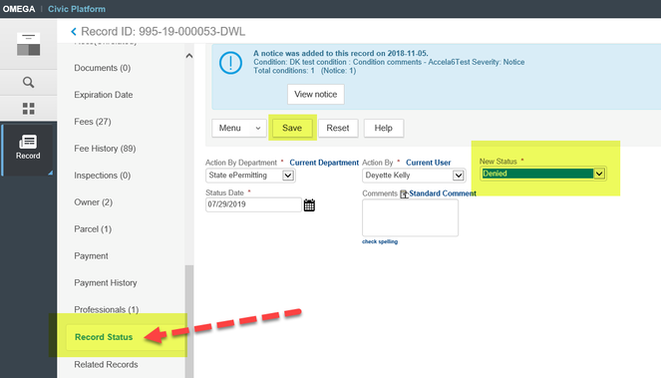 The State of Oregon ePermitting has launched SelecTXT, a new service allowing contractors and homeowners to utilize interactive text messaging to:
An end-user brochure is available for your lobbies, to provide with issued plans, or to hand out to your contractors along with an informational/instructions document for agencies. We have also created a short video tutorial to demonstrate how easy SelecTXT is to use. A Permit Fee Retention can be charged by an agency as a way to recoup the cost of work already completed on a permit (i.e. inspections) that ends up being withdrawn by the applicant. The Oregon Standard Model has the Permit Fee Retention broken out into 3 standard percentage rates to assist with this. 20% Permit fee retention - plumbing 50% Permit fee retention - plumbing 75% Permit fee retention - plumbing The Permit Fee Retention process precedes the consideration of any refund and because it is the retention of actual permit fees, it invokes State Surcharge, which is based upon the percentage of the total amount of permit fees retained. Note: Retention of Plan Review fees are not subject to State Surcharge. To process the Permit Fee Retention, go to the Fees tab in the record navigation pane. Select the applicable permit fees that have been invoiced and paid and void them to credit if they have not been credited already. 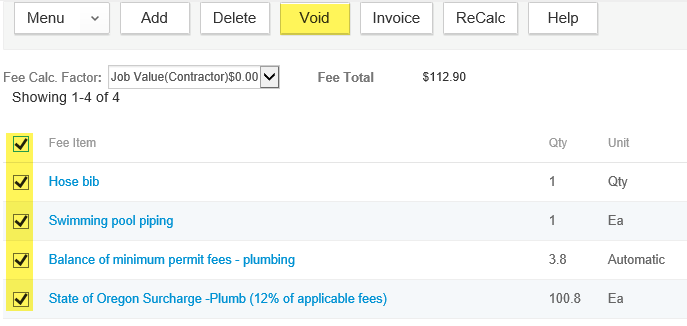 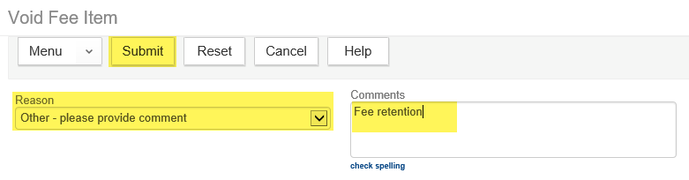 Then click the Add fee button. 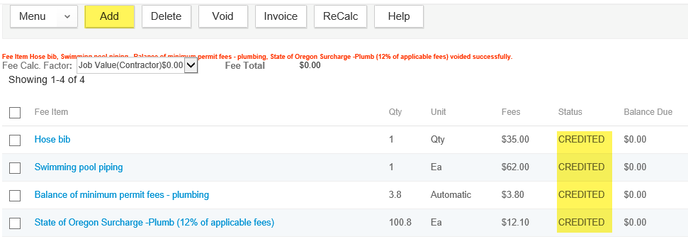 Locate the percentage rate that you are going to retain of the permit fees paid based upon work already completed. Enter the total amount of permit fees that were paid and are eligible to be potentially refunded (excluding previously paid State Surcharge) in the Quantity Box. 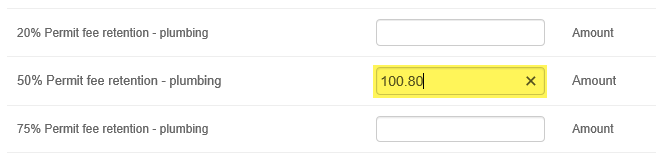 Click Submit – the Permit Retention fee will calculate the percentage at the rate you selected and will automatically recalculate State Surcharge at 12% of what is being retained. Invoice the new Retention and State Surcharge fee items. 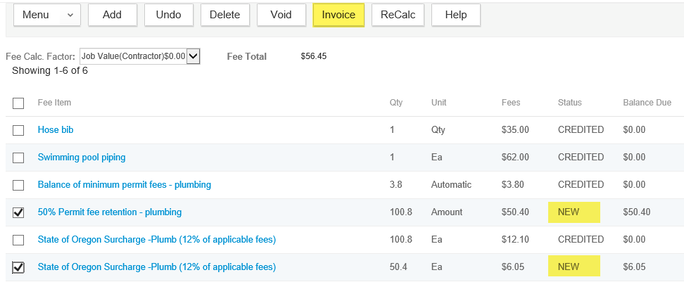 Go to the Payment tab. Note that you now have Unapplied fees (from voiding the permit fees to credit) in the Amount Not Applied. Select the source payment in the Transactions section that shows a Not Applied balance (transactions appear at the bottom of the Payment screen). Select the Apply button to now reapply these monies. 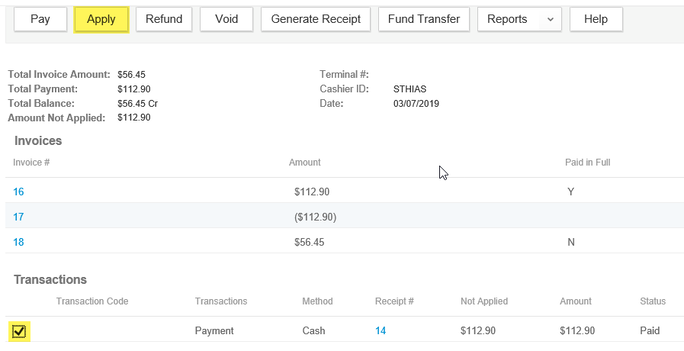 Apply the monies to the Permit Fee Retention and the State Surcharge that are showing an outstanding balance. Consider paying any other fees that still show an outstanding balance if the work has already been performed – if it is not appropriate to pay any other remaining unpaid fee items, void them prior to beginning the next step in the Fees tab to show they are no longer applicable. 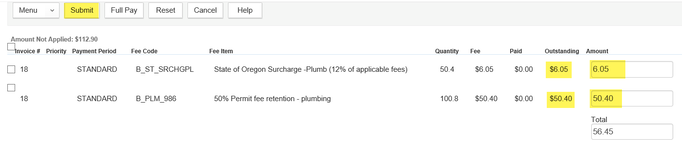 The Amount Not Applied balance that is remaining is what is then eligible for the agency to refund to the customer.
Refer to How to complete a Refund documentation on Kayako: http://orepermittinghelp.kayako.com/Knowledgebase/Article/View/15 Here is a tip to make logging in way quicker. If you have the Accela log in page in your favorites, you just need to add some simple commands to auto fill your Agency and Username.
https://av-oregon.accela.com/security/hostSignon.do?&agency=OREGON&userid=nflowers When you click on your favorite link, your agency and username will be auto filled in. How to Bookmark/Favorite a web site: Chrome users: Right click on your shortcut and click on EDIT 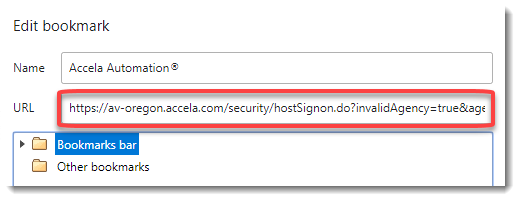 Edit the Bookmark. Change the information in the URL I posted above with your own information. Copy & paste it, replacing what is currently in the URL box and then click on SAVE. 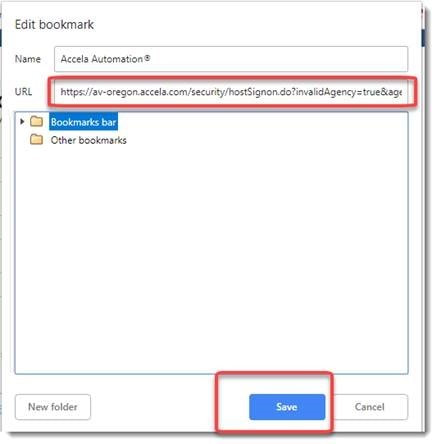 Internet Explorer users: Right click on your shortcut and select PROPERTIES 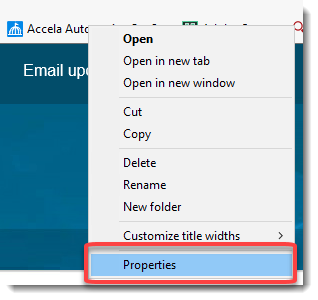 Change the agency and user id in the link I posted above to reflect your own information. Copy & paste it into the URL box and click OK: 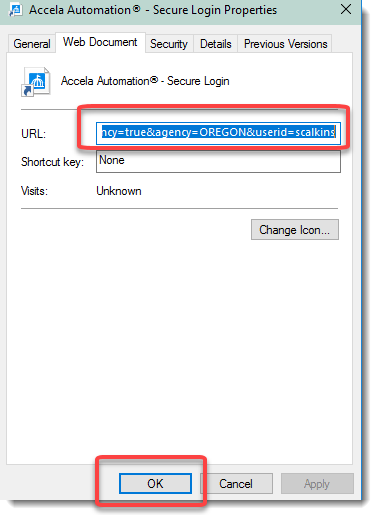 The ability to perform inspections with the use of a mobile device has significantly changed the options inspectors have to do their job. For inspectors that are use to carrying permit folders and carbon copy inspection reports around everyday the Accela Inspector App offers the ability to access all permit and inspection information with a simple search. Additionally, an inspector can access multiple jurisdictions from the Accela Inspector App allowing them access to all of the permit and inspection information for each jurisdiction that an inspector might be working in. The only thing required to access another jurisdiction is to log out of the Accela Inspector App and change the jurisdiction before logging back in. Username and passwords will remain the same for each user so only the jurisdiction information would need changed.
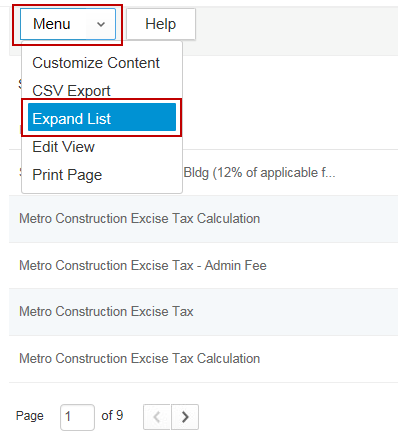
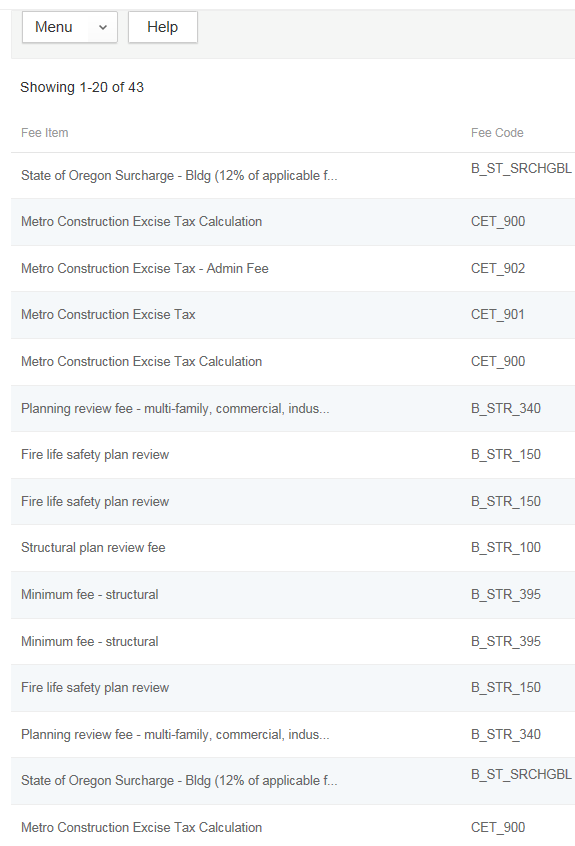
An example of this could be an inspector who works for a city, but also does inspections in the county under an agreement between the two jurisdictions. For this example lets say the inspector does structural for the city and plumbing for the county. Before performing a new inspection the inspector will need to verify if there are any outstanding issues on either of the permits (separate jurisdictions). With the use of the Accela Inspector App the inspector only needs to log in to the correct jurisdiction to access the information. In another example, the inspector might be on the job to inspect one discipline (plumbing) when a contractor asks for a structural inspection. In the paper world the inspector would have no access to the permit information without going back to the office or calling to get the information. With the use of the Accela Inspector App the inspector only needs to search for the permit and can schedule and complete the new inspection or schedule it for a later date and have the option to assign it to a different inspector if necessary. Have questions? Need help? Please don't hesitate to contact me about the Accela Inspector App. I can be reached via email at [email protected]. When viewing a list that has more than five items, you can expand the list view, by following these short steps. Go to the list your interested in viewing > hover over Menu > click on Expand List.
Payment, Fee, and Workflow History and are available as tabs on individual records thru Navigation and include date and user details that can be extremely helpful when you are trying to problem solve an issue or explain changes on a record. Fee History provides a line-by-line log of every fee-related update made on the record including things that are done thru scripting in the database such as the automation of fees at intake. Payment History provides the same detail for anything related to payments including payment action information such as the payment simply being posted, then when it’s applied, and if it’s ever voided, etc. Lastly is Workflow History and this is very necessary when trying to backtrack why the workflow was advanced, when, and by whom – down to the timestamp for sequence of events so you can evaluate what might have happened. Also in Workflow History, a task comment (not task status) can be actively changed or edited by certain user groups so mistakes like typos or missing information can be corrected and saved.
The Inspection Log is available thru the Inspections tab on a record or thru the Inspections page. Select the View Log button > Inspection Log. If on an individual record, a pop-up comes up with the log history for the record you are specifically on – consider backdating the start date if the record is older than the default one month. If on the Inspections page, checkbox the particular inspection you want to view log history on and then select Inspection Log to run it. The start date may have to be adjusted here as well. In both cases, you will be shown a complete audit log of any and all updates made to that inspection including who scheduled it and when, what the status is and when, any request comment made, which inspector it was assigned to and much more. We use all of these logs daily in ePermitting to better assist in problem solving helpdesk tickets with agencies and to gather the necessary details that aren’t immediately available in other areas in the system or on the record. Note that you can export all of these from the Menu button as CSV Exports into Excel and further analyze the data, etc. Getting familiar with each of these will definitely help to advance your problem solving skills in Accela! You can easily enter today’s date into any date field in Accela with a single key stroke! Simply place your cursor in the date field then press the Space Bar on your keyboard and click any where off of the field. Today’s date will automatically populate! You can do this in place of clicking on the calendar picker icon to select the date. 1. Place your cursor in any date field: 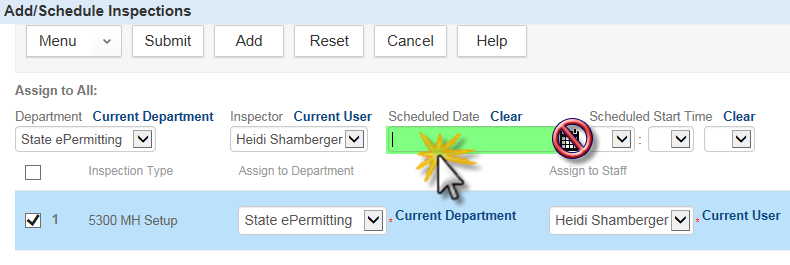 2. Press the Space Bar on your keyboard then click off of the field. Today’s date will automatically populate. 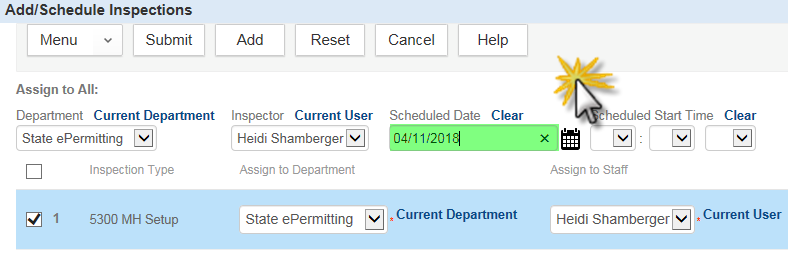 Does your agency access the Data Warehouse (DW) for reporting purposes? If so, you are probably aware of the lag that can sometimes occur in the DW, causing the data to be out of sync with the actual Accela Production database. There is a simple query that you can execute in the DW to find the “heartbeat” or the last updated date and time that the DW was in sync with the Production database:
select * from accela.stream_heartbeat; Marion County, who heavily relies on the DW, even wrote a report for end users to generate that shows the last updated date and time using this query so that they are aware when there is a lag. If you are an OSM agency, you probably have noticed the really long strange hyperlink automatically generated in the workflow emails. This is what Accela calls a “Deep Link.” It is a hyperlink that takes a user directly to a specific record in Citizen Access without having the user perform a search for their record. This adds a lot of convenience for the customer because they can simply click on the hyperlink in the email and are routed directly to their record in ACA for paying fees, scheduling inspections, tracking the status, or uploading documents. We programmed the system to generate the Deep Links in each workflow email, however, you can manually generate a Deep Link too if you would like to send an Accela adhoc email through Communications or send it in an email outside of the system. Here’s how: 1. Go to this special URL for Citizen Access in Production. It will look a little bare because it does not include the ePermitting wrapper. https://aca.oregon.accela.com/oregon/welcome.aspx 2. Then search for the record. Once you are viewing the record, copy the URL. This is the Deep Link that can be copied and pasted into an email to the customer. It is formatted in a special way with the record number information.  Example Record: 385-17-000967-PLM
Deep Link: https://aca.oregon.accela.com/oregon/Cap/CapDetail.aspx?Module=Building&TabName=Building&capID1=17CAP&capID2=00000&capID3=000RJ&agencyCode=HAPPY_VALLEY&IsToShowInspection= The CSV Export function in Accela allows you to export all the data that appears on the screen directly into an Excel spreadsheet. This export allows you to access large number of entries that would not all appear on the screen at one time in Excel for quicker searching and/or organization. For example:
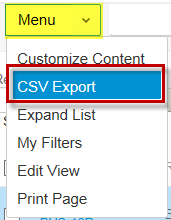 To access the CSV Export function, all you need to do is hover over the Menu dropdown and select CSV Export.
Your browser will then ask if you want to Open or Save the document. This will automatically open or save in an Excel spreadsheet. Note: on some local networks, it will open in Notepad. If this happens you will need to work with your IT Department to change the default to Excel. The CSV Export function is available on all list pages, including:
There are many list pages in Accela, including the Record List, Inspections List, Fees List, Alerts List, etc. You can expand the number of items you see in the list per page by going to Menu > Expand List. Most times, this will expand the number of items to 20 per page. This is helpful in the New UI where there is ample “real estate” to take advantage of. To shrink the list again, go to Menu > Contract List. 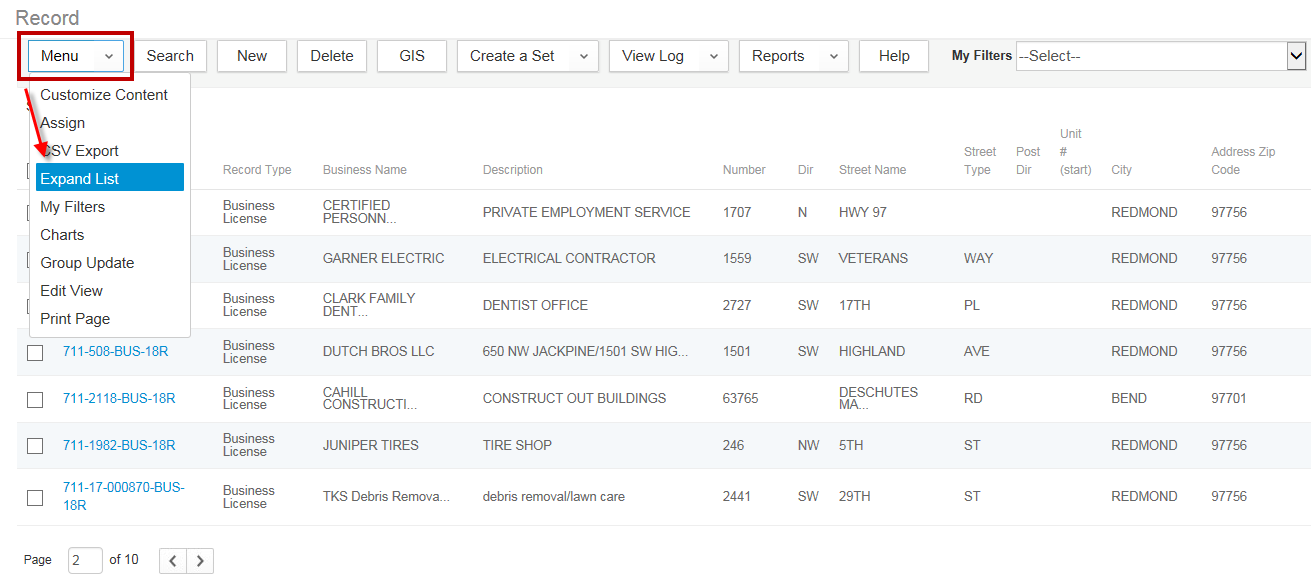 List Pages – Sorting by Column Headings You can also sort by any of the column headings in list pages. Simply click on the column heading to sort the list by that data item. The sort will be in descending order for the first click. Click a second time and it will sort in ascending order. The sort will move back to the default once you navigate away from the list. 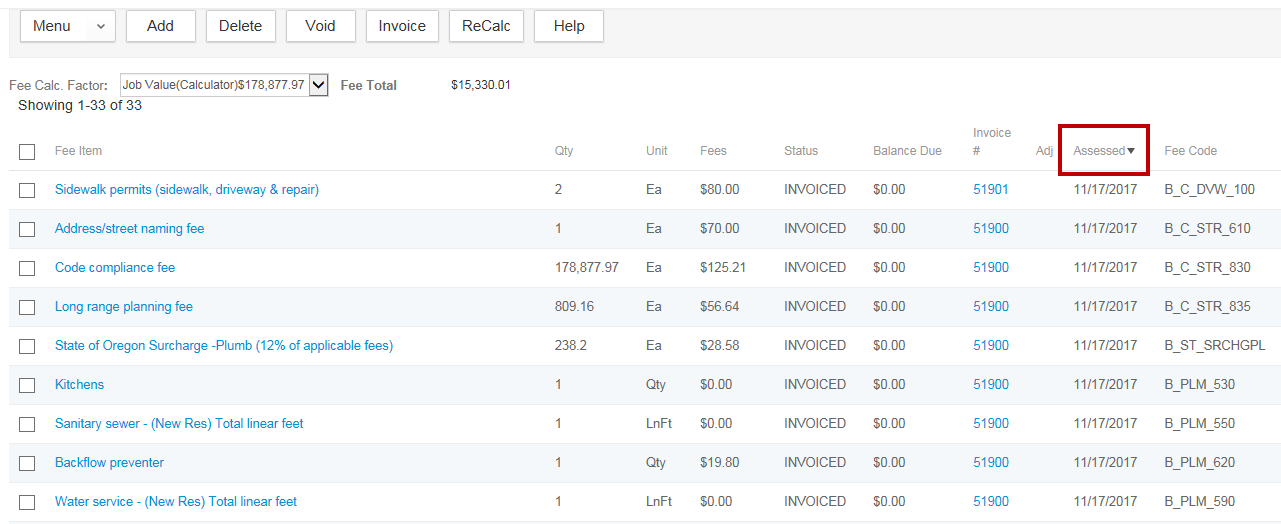 |
DisclaimerPlease be aware that this content is relevant at the time it is published, but as time goes on may become out-of-date. We will do our best to keep the content alive and relevant. Archives
June 2024
Categories
All
|
 RSS Feed